
Products & Inventory
Manage your product catalogue, variants, SKUs, and stock levels in SKU Manager
Products & Inventory
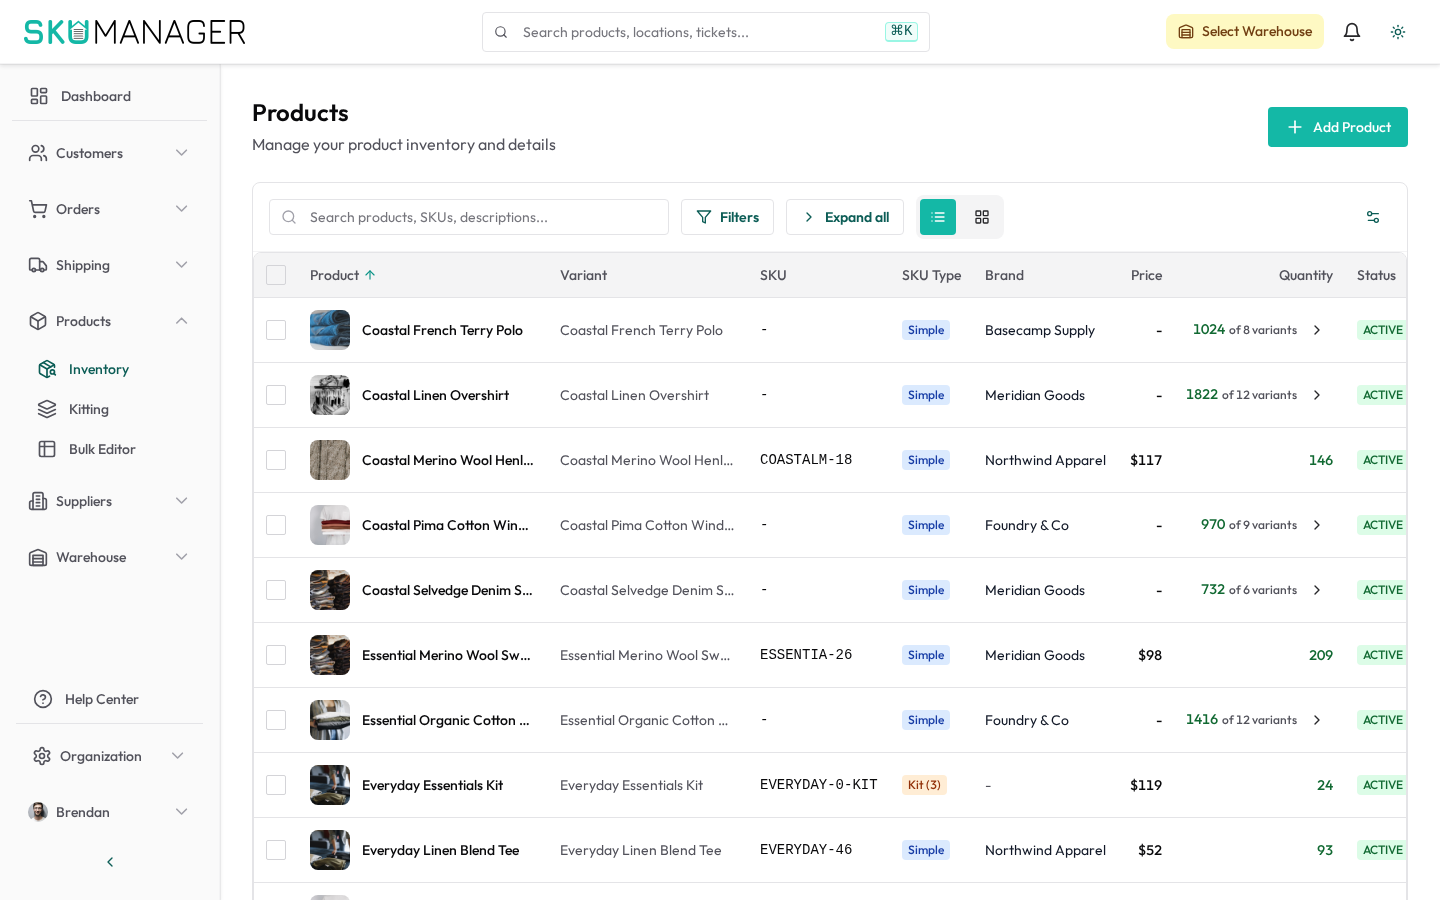
SKU Manager organises your catalogue around products (the sellable item) and variants (each distinct size, colour, or configuration of that product). Every variant has its own SKU and is tracked independently in inventory.
Understanding Products and Variants
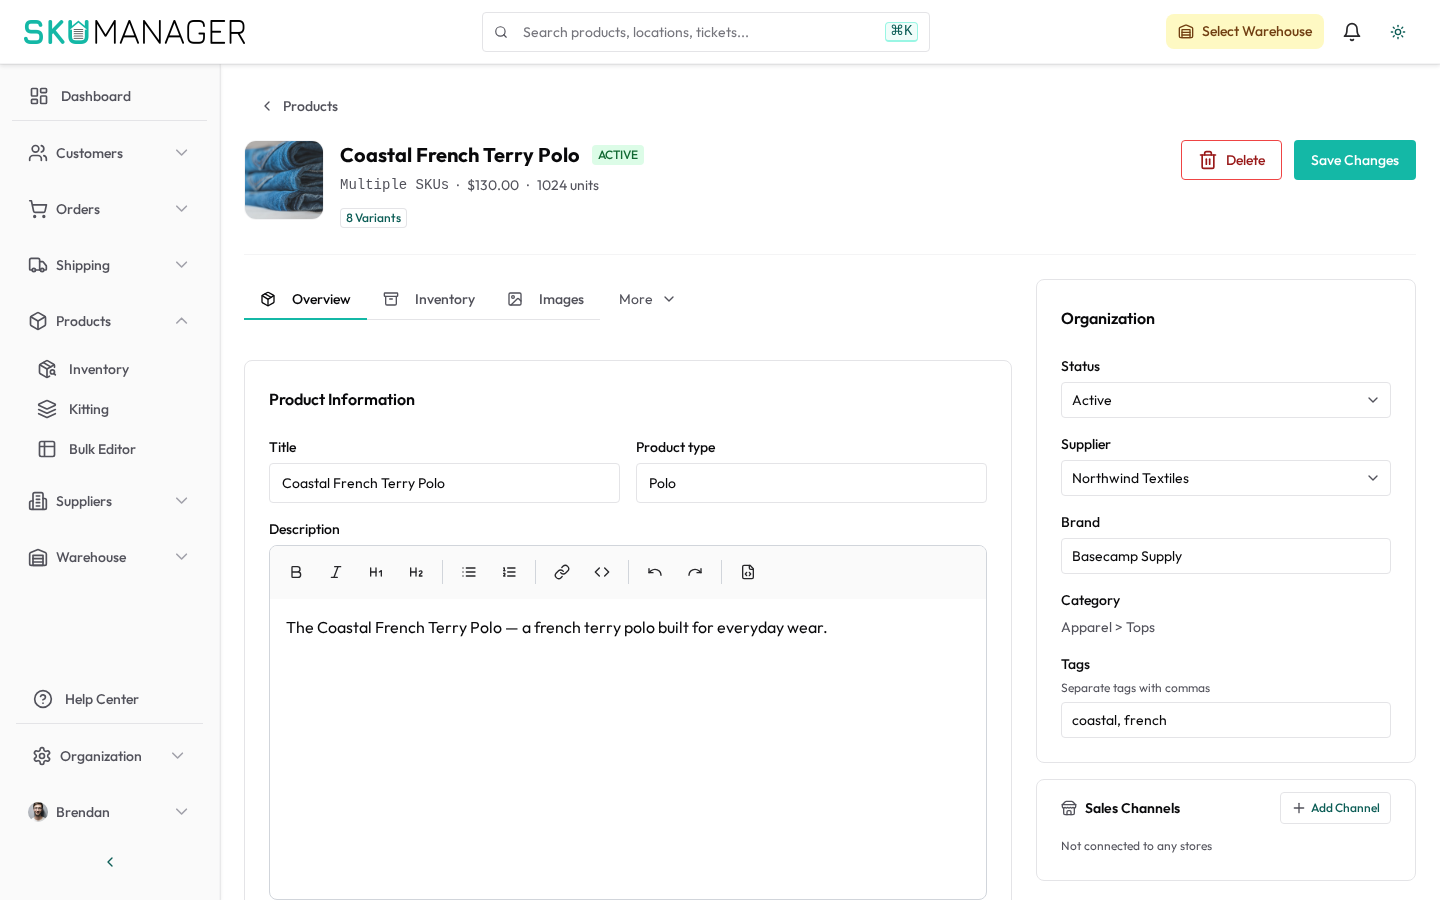
A product is the top-level catalogue entry — for example, "Classic Crew T-Shirt". Each distinct combination of options (size, colour) becomes a variant:
- Classic Crew T-Shirt / Small / Black → SKU
CCT-S-BLK - Classic Crew T-Shirt / Medium / White → SKU
CCT-M-WHT
Products are managed under the Products menu. Clicking a product opens its detail page, where you can edit attributes and view all variants and their current stock levels.
Adding a Product
- Navigate to Products → Add Product
- Enter the product name, description, and category
- Define option groups (e.g. Size, Colour) — SKU Manager generates all variant combinations automatically
- Review generated variants and assign a unique SKU to each
- Set an initial stock level per warehouse location if needed
- Click Save
SKU Naming Conventions
A consistent SKU format helps warehouse staff identify items quickly and prevents duplicates. A recommended format is:
[BRAND/RANGE]-[SIZE]-[COLOUR/VARIANT]
For example: CCT-S-BLK — Classic Crew T-shirt, Small, Black.
Guidelines:
- Use uppercase alphanumeric characters and hyphens only
- Keep SKUs under 20 characters where possible
- Never reuse a SKU, even after a product is discontinued
- Avoid spaces and special characters — they cause scanning errors
SKU Manager enforces SKU uniqueness across your entire catalogue and will reject duplicates on import or manual entry.
Importing Products via CSV
For bulk catalogue setup, use Products → Import:
- Download the CSV template from the import page
- Fill in product name, variant options, SKUs, and optional stock levels
- Upload the CSV and review the preview — the wizard flags errors before applying
- Click Import to apply
Existing products are matched by SKU. Rows with a matching SKU update the product; rows with a new SKU create a new variant.
Cycle Counts
A cycle count is a targeted partial stocktake — counting a subset of products or locations rather than your full warehouse. Cycle counts keep inventory accurate without halting operations.
To run a cycle count:
- Go to Warehouse → [Warehouse] → Stock-Take
- Filter by product category, warehouse zone, or a specific bin location
- Print or export the count sheet, or use the mobile scanner view
- Enter actual quantities found for each SKU
- Review the variance report — highlighted rows indicate discrepancies
- Commit the count to apply it and update stock levels
Stock-take and cycle-count history is retained for audit purposes in the Warehouse area.
Reorder Points & Low Stock Alerts
Set a reorder point for each variant to get notified before you run out.
- Open a product variant and go to the Inventory tab
- Set Reorder Point — when available stock drops to or below this level, an alert is triggered
- Optionally set a Reorder Quantity to pre-fill purchase order amounts
Alerts appear on the Dashboard and can be sent by email. Configure your email notification preferences under Settings → Profile → Notifications.
The Warehouse area lists all variants currently at or below their reorder point, sortable by severity (how far below the threshold).
Editing & Archiving Products
To update a product name, description, images, or options, open the product and click Edit.
To remove a product from active views without deleting its history, click Archive. Archived products no longer appear in search or order picking, but their inventory history and order references are preserved. You can restore an archived product at any time from Products → Archived.
Deleting a product permanently is only possible when it has no stock and no associated orders.
Product Images
Attach images to a product from the product detail page under the Images tab. Images sync to connected Shopify stores automatically. Supported formats: JPEG, PNG, WebP (max 20 MB per image).